Master your photo-taking with these iPhone 14 camera tips
The iPhone 14 series boasts remarkable camera capabilities, but mastering its features can be a game-changer for your photography. Whether you’re using the iPhone 14 or the iPhone 14 Pro, these tips will help you capture stunning photos and videos effortlessly.
In this blog:
- iPhone 14 tips:
- Camera Alignment: Use the Grid and Level tools for perfect alignment.
- Exposure Adjustment: Manually adjust exposure for better control of lighting.
- Selfie Camera: Mirror the selfie camera for accurate previews.
- Enhanced Shots: Utilise Live Photo and Night Mode for improved photos in various conditions.
- Video Stabilisation: Use Action Mode to stabilise videos.
- iPhone 14 Pro and Pro Max Tips:
- Use ProRAW format for high-quality images.
- Shoot at maximum resolution for detailed photos.
- Enable Macro Control for close-up shots.
Tips for all iPhone 14 models:
Use the Grid tool
Ever heard of the rule of three when it comes to photography? Well, you’re in luck as the iPhone 14 camera settings offer a gridline feature to help you accurately line up your frame for that perfect shot. Once turned on, you’ll see gridlines automatically appear on your camera every time you go to take a shot. Here’s how to turn it on:
- Open Settings.
- Click on your iPhone 14 camera settings.
- Toggle on the Grid setting.
Use the Level tool
If you often take photos directly above the subject (we’re talking to you foodstagramers), then you’ll want to use the level tool to help you straighten and compose your shot. Once turned on, the level tool will automatically come on in the form of a yellow arrow in the centre of your shot when you go to take a picture directly above an object. Here’s how to turn it on:
- Open Settings.
- Click on your iPhone 14 camera settings.
- Toggle on the Level setting.
Manually adjust the exposure
If you want to make sure your photos look the best they possibly can, then you need to adjust your exposure each time you snap a pic using your iPhone cameras. This will help to enhance your photos if you’re in low light or bright conditions. Here’s how to do it:
- Open your iPhone 14 camera.
- Click the arrow at the top of your screen.
- Swipe across to the Exposure button and adjust using the light meter.
Mirror the selfie camera
Not liking your selfies but not sure what the problem is? It could be that your photos aren’t mirrored. The only time we see ourselves is through a mirror, so when you take a selfie and the image isn’t mirrored it can be slightly unsettling. To fix that, simply go into your iPhone 14 camera settings and turn on the Mirror Front Camera feature – here’s how:
- Open Settings.
- Click on your iPhone 14 camera settings.
- Toggle on the Mirror Front Camera setting.
Use Live Photo
Looking for ways to adjust your iPhone 14 camera settings for best quality photos? If you haven’t tried Live Photo yet, you should definitely give it a go! When Live Photo is turned on, your iPhone will record what happens 1.5 seconds before and 1.5 seconds after you’ve taken a picture. You’ll then be able to go through those extra seconds of recording to pick the best shot or add cool effects like Bounce and Loop. Here’s how to use it:
- Open your iPhone 14 camera.
- Make sure the Live Photo feature is turned on (it’s a bullseye-type icon in the top right of your camera screen – if it has a line through it, then you’ll need to tap the icon to turn it on).
- Take a photo.
- Open the photo.
- Click the Live button in the top left and select your desired effect.
- To pick the best shot for your image, click the Edit button.
- Select Live from the menu at the bottom of the screen.
- Swipe through the snaps to find your best shot.
- Click on the shot you want and select the Make Key Photo option.
Use Night Mode
If you’re ever in a low-light setting and want to take the best quality pictures using your iPhone 14 cameras, knowing how to use and adjust the Night Mode feature will come in handy. The Night Mode feature will only appear when you’re in low-light conditions with your camera app open. Here’s how to adjust it:
- Open your iPhone 14 camera.
- Tap the arrow at the top of your screen.
- Select the Night Mode icon (it looks like a crescent moon).
- Use the slider to adjust the capture time. Ideally, the darker the condition, the longer your capture time should be.
Use Action Mode for your videos
Want smoother videos without buying an expensive gimbal? Just turn on Action mode within your iPhone 14 camera settings! Action Mode will smooth out your videos to avoid shaking shots. Here’s how to turn it on:
- Open your iPhone 14 camera.
- Select Video.
- Tap the arrow at the top of your screen.
- Select the Action Mode icon (it looks like a man running).
- Click On.
Tips for iPhone 14 Pro and iPhone 14 Pro Max models:
Take photos in ProRAW format
For those looking for iPhone 14 Pro camera tips or who want to learn how to master their iPhone 14 Pro Max camera settings for the best quality photos, using ProRAW format is a game-changer. Changing your photo format from Apple’s standard HEIC to ProRAW will stop your photos from being compressed and give you tons more flexibility if you’re looking to edit your photos in post-production using tools like Adobe Photoshop. The only thing to note is that this makes your file sizes much larger! Here’s how to select ProRAW as your image file type:
- Open Settings.
- Click on your iPhone 14 Pro or iPhone 14 Pro Max camera settings.
- Select Formats.
- Toggle on the Apple ProRAW feature (you can also toggle on the Apple ProRes feature if you want the same benefits for your videos).
Shoot at max resolution
If you’re going to benefit from ProRAW images, you may as well make sure you’re using the maximum resolution for your photos too. By default, your iPhone 14 cameras will be set to 12MP when shooting in ProRAW. To capture much more detail in your photos, here’s how to switch to 48MP:
- Open Settings.
- Click on your iPhone 14 Pro or iPhone 14 Pro Max camera settings.
- Select Formats.
- Make sure the Apple ProRAW feature is toggled on.
- Click the ProRAW Resolution setting.
- Change the resolution from 12MP to 48MP.
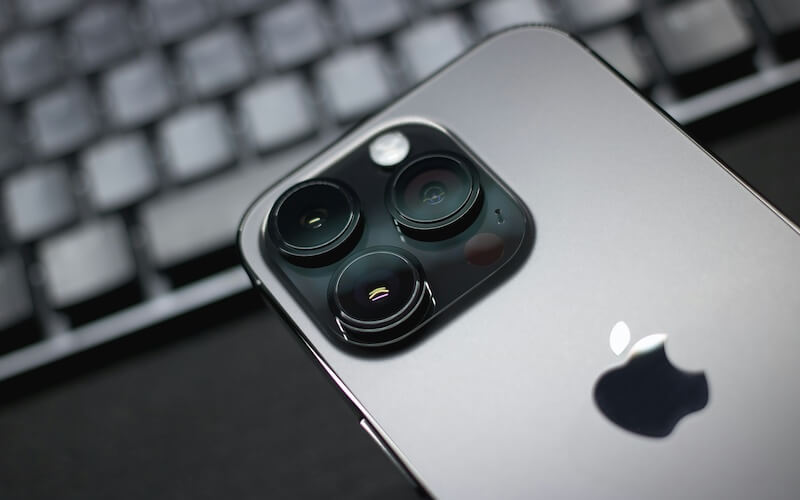
Enable Macro Control
Have you had any trouble with your camera switching between lenses while you try to focus your shot? You’re not the only one to notice this iPhone 14 Pro camera focus issue! The iPhone 14 Pro and Pro Max both have a Macro camera, which is great for capturing close-up detail, however your phone can sometimes jump into Macro mode when you don’t want it to. To fix this, you can enable Macro Control in your settings – here’s how:
- Open Settings.
- Click on your iPhone 14 Pro or iPhone 14 Pro Max camera settings.
- Toggle on Macro Control
Now when you go to take a close-up shot in your camera app, you should see a Macro button (the icon looks like a flower) that you can select and deselect to manually switch between camera lenses.
By implementing these iPhone 14 and iPhone 14 Pro camera tips, you’ll be able to harness the full potential of your camera!
Want to switch your iPhone 14 for the Pro Max or looking for a newer upgrade? Buy refurbished iPhone devices here at the musicMagpie Store to upgrade for less! Choose from refurbished iPhone models like refurbished iPhone 14 Pro Max, refurbished iPhone 15, refurbished iPhone 15 Pro and much more. Plus, you can trade in your iPhone for cash towards your next device!


Recent Comments
on Which British artist has sold the most albums?
on Who is the most popular video game character (based on sales)?
on Which British artist has sold the most albums?
on COVID-19 update: We’re here to help you work, connect and play from home
on COVID-19 update: We’re here to help you work, connect and play from home